Full Tutorial: Pipelines in Power Platform
How to set up pipelines in Power Platform

Full Tutorial: Pipelines for Power Platform
In this tutorial, I demonstrate a step-by-step walkthrough on how to set up pipelines in Power Platform to enable you deploy solutions as well as configuration for the target environment such as connections, connection references, and environment variables.
A few things to note:
The pipelines host is recommended to be a production environment. but it does doesn't have to be a Managed Environment.
All other environments used in pipelines must be enabled as Managed Environments.
However, if you are using developer environments, they aren't required to be Managed Environments. They can be used for development and testing with the developer plan.
Prerequisites:
One environment to be used as the host environment.
Other environments for dev, qa, prod etc. In my case, I have dev and prod only in this tutorial.
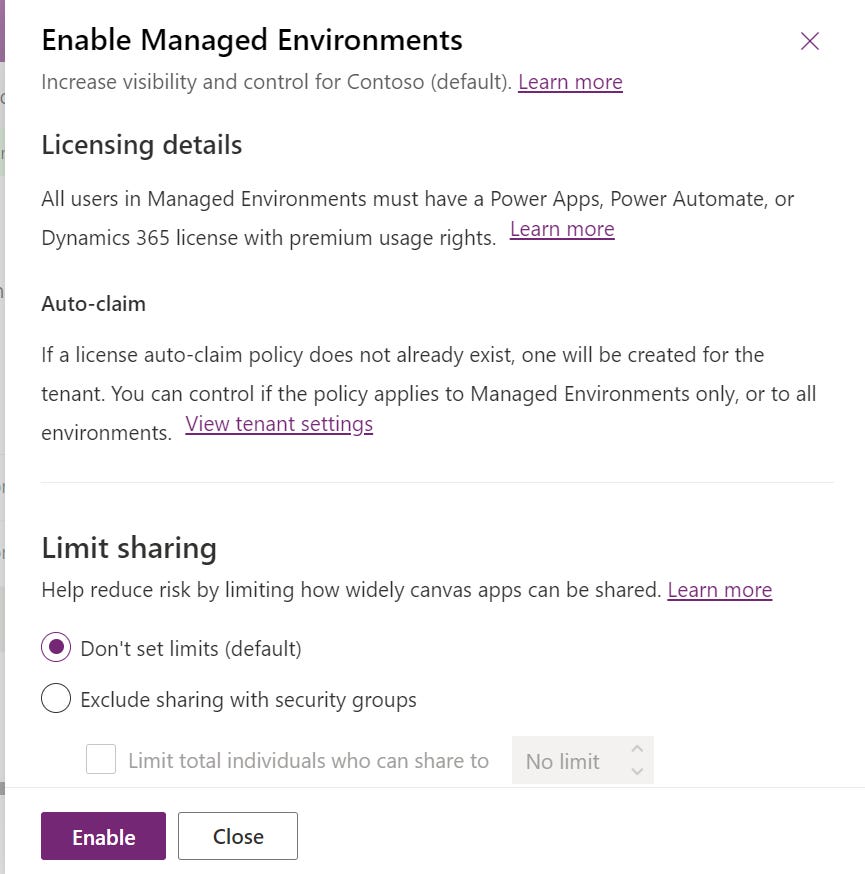
Enable your current environments as Managed Environment
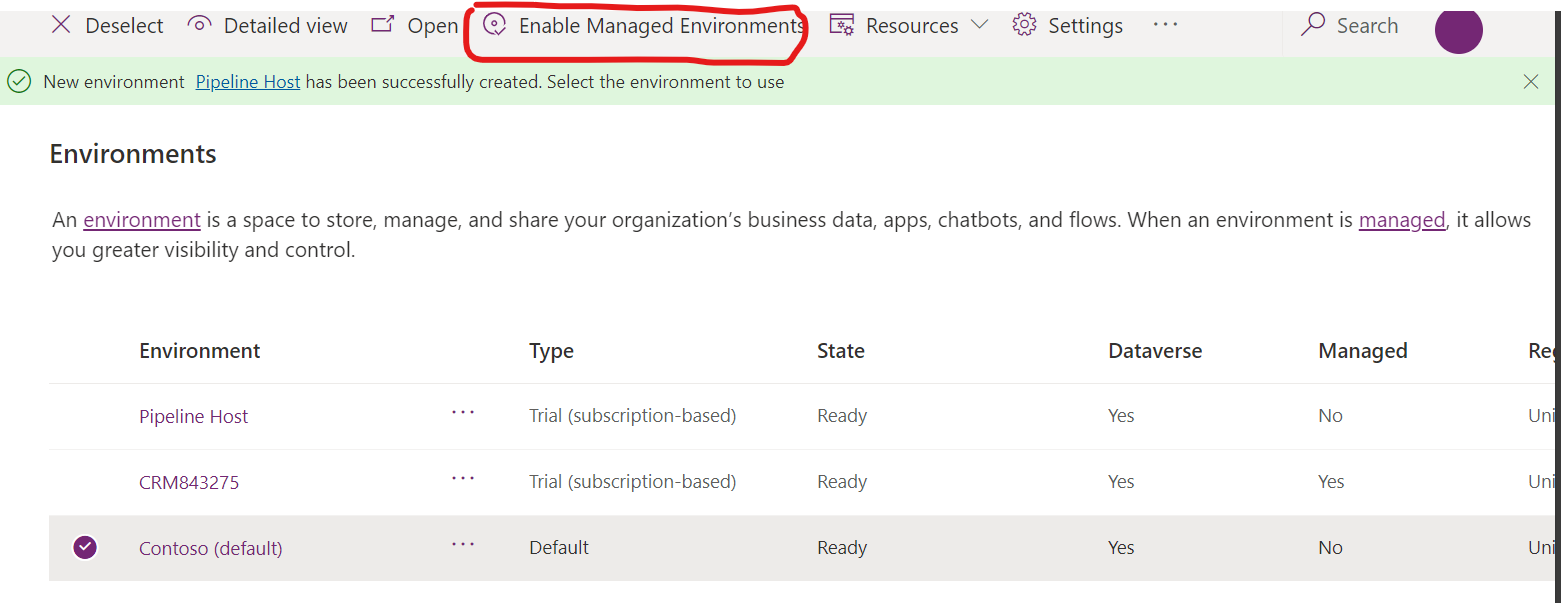
From the Power Platform Admin Center, navigate to the environment or just select it from the list as shown below:
From the ribbon bar, navigate to Enable Managed Environments

on the next screen, click on Enable.
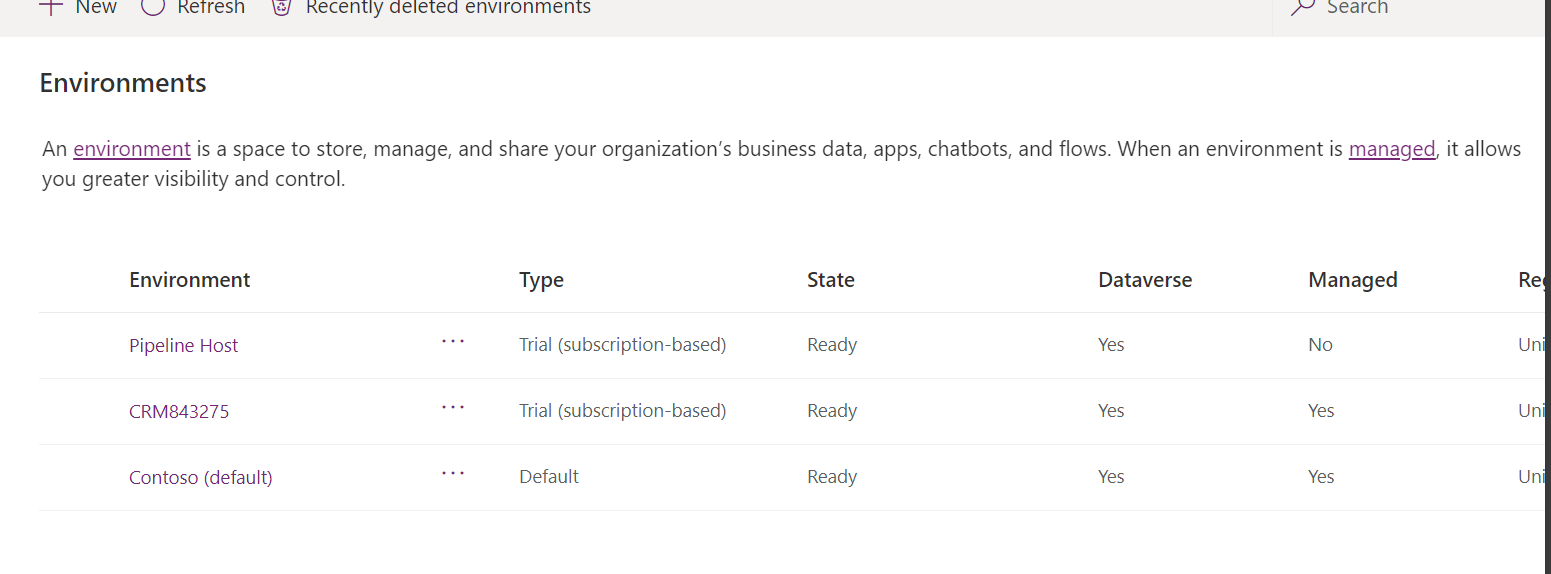
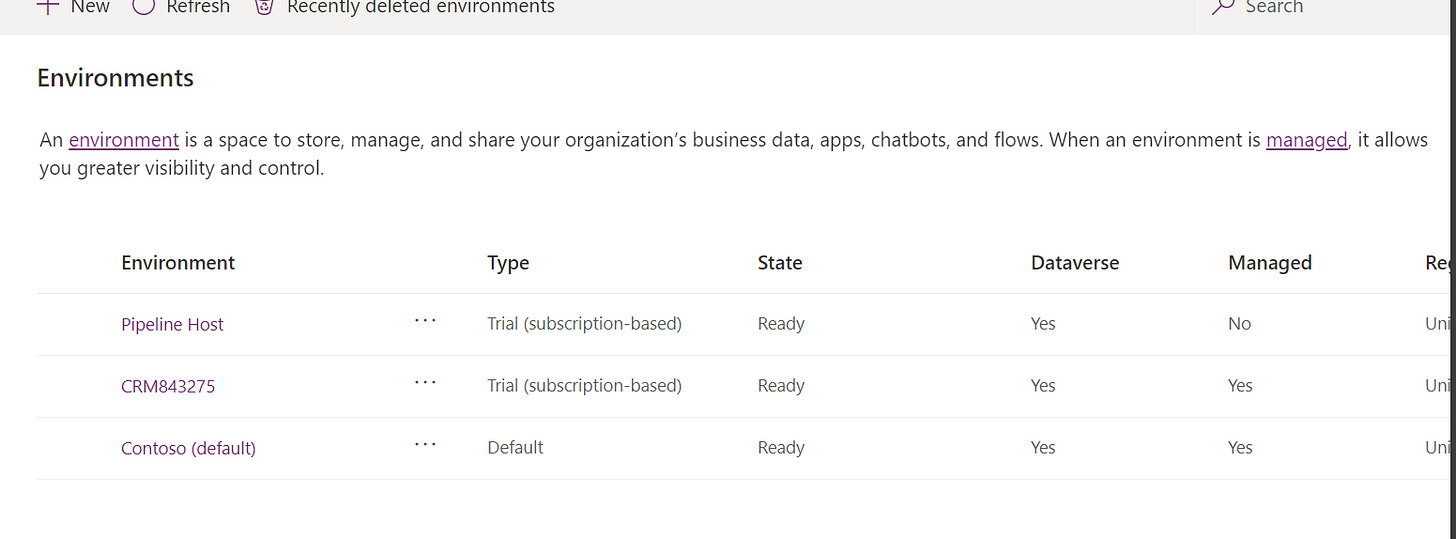
Do the same for other environments.
Your environments should be looking similar to this:
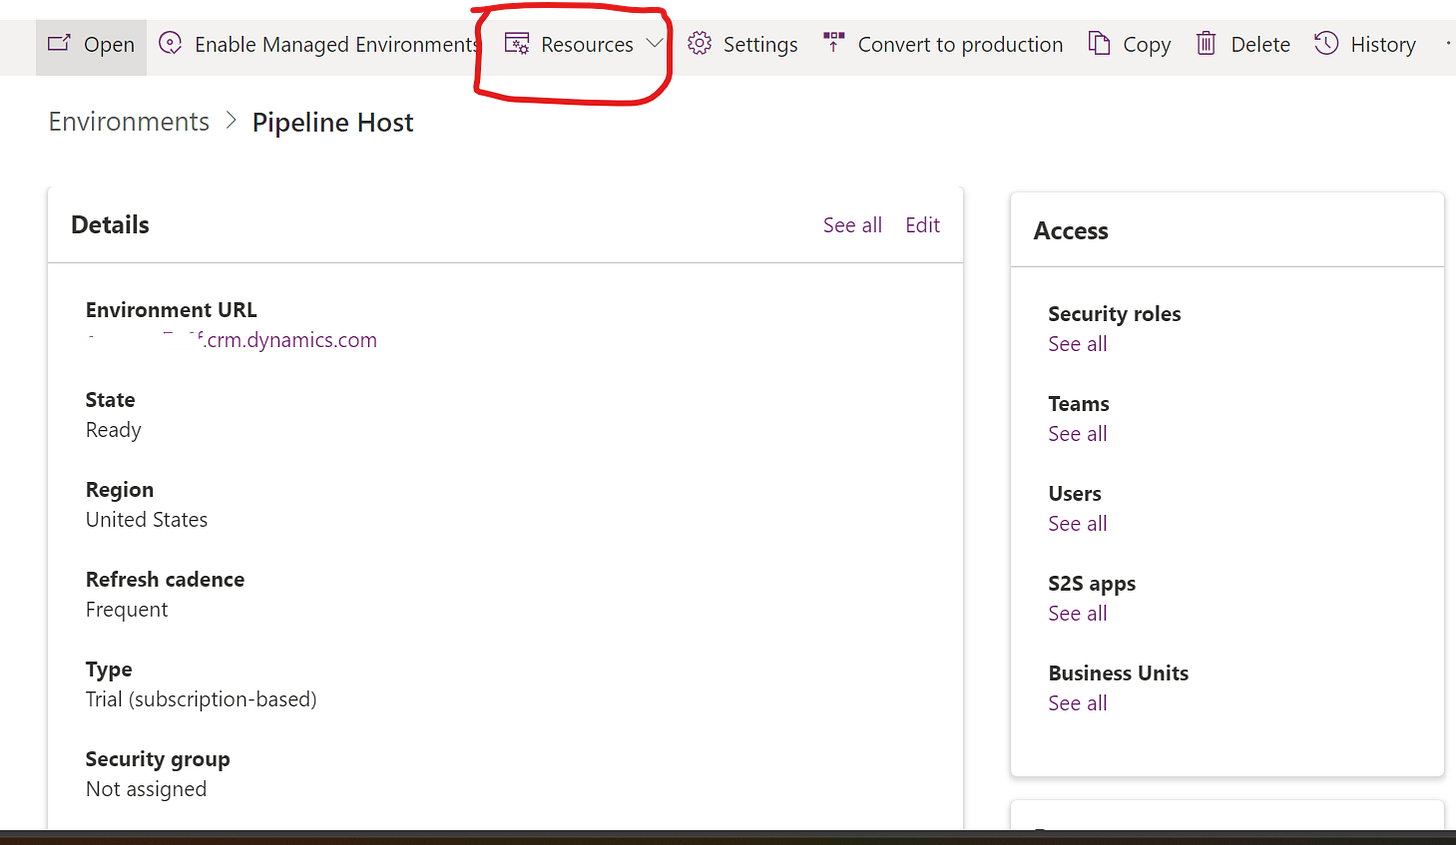
Install the Power Platform Pipelines app on the host environment.
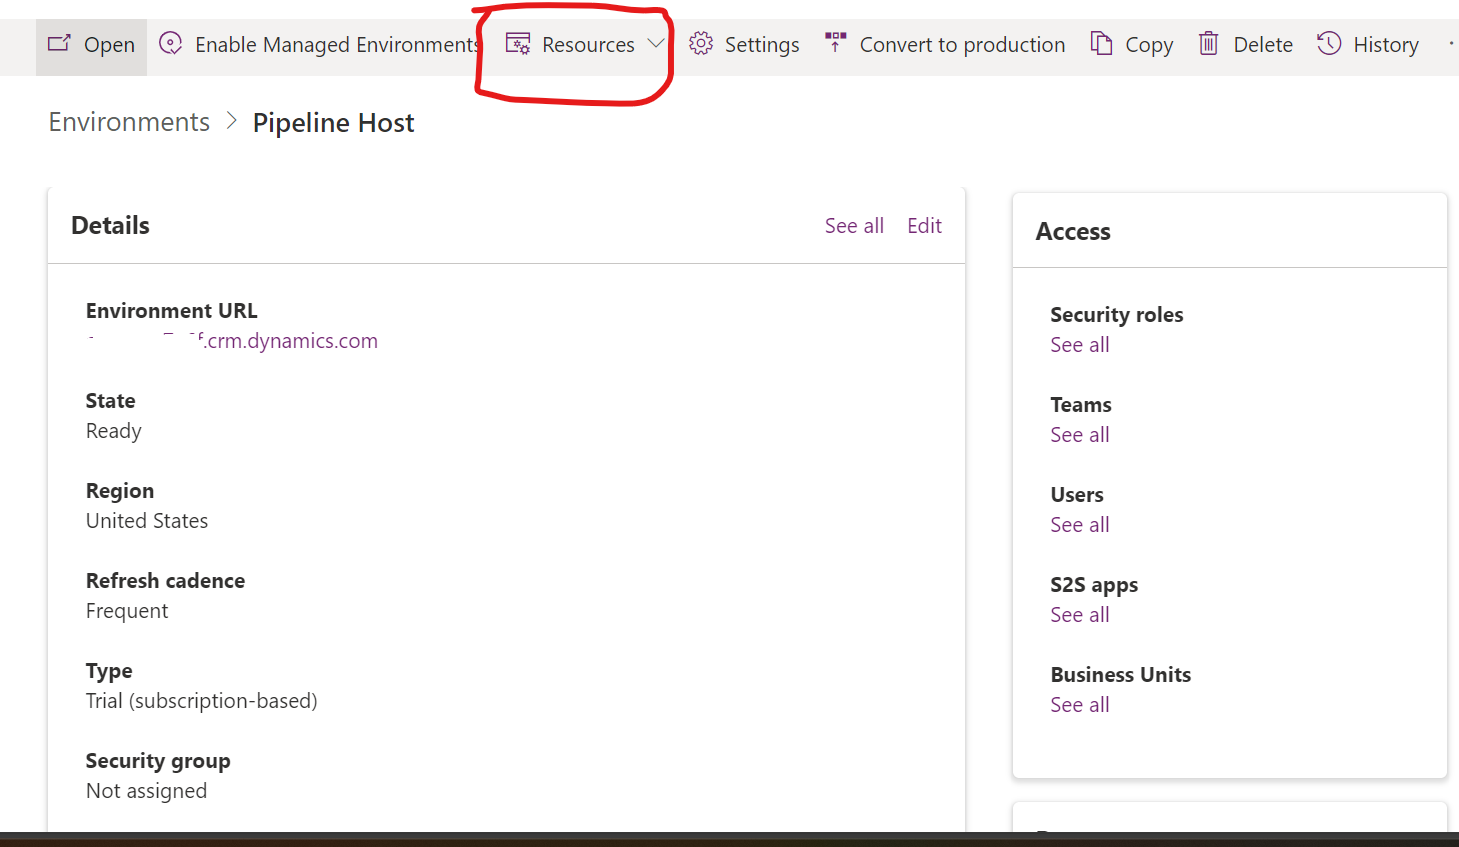
Navigate to the Pipeline host environment.
From the ribbon bar, navigate to Resources -> Dynamics 365 Apps
On the Dynamics 365 Apps page, From the Ribbon bar, click on Install Apps
From the list of Apps, Select Power Platform Pipelines and click Next.
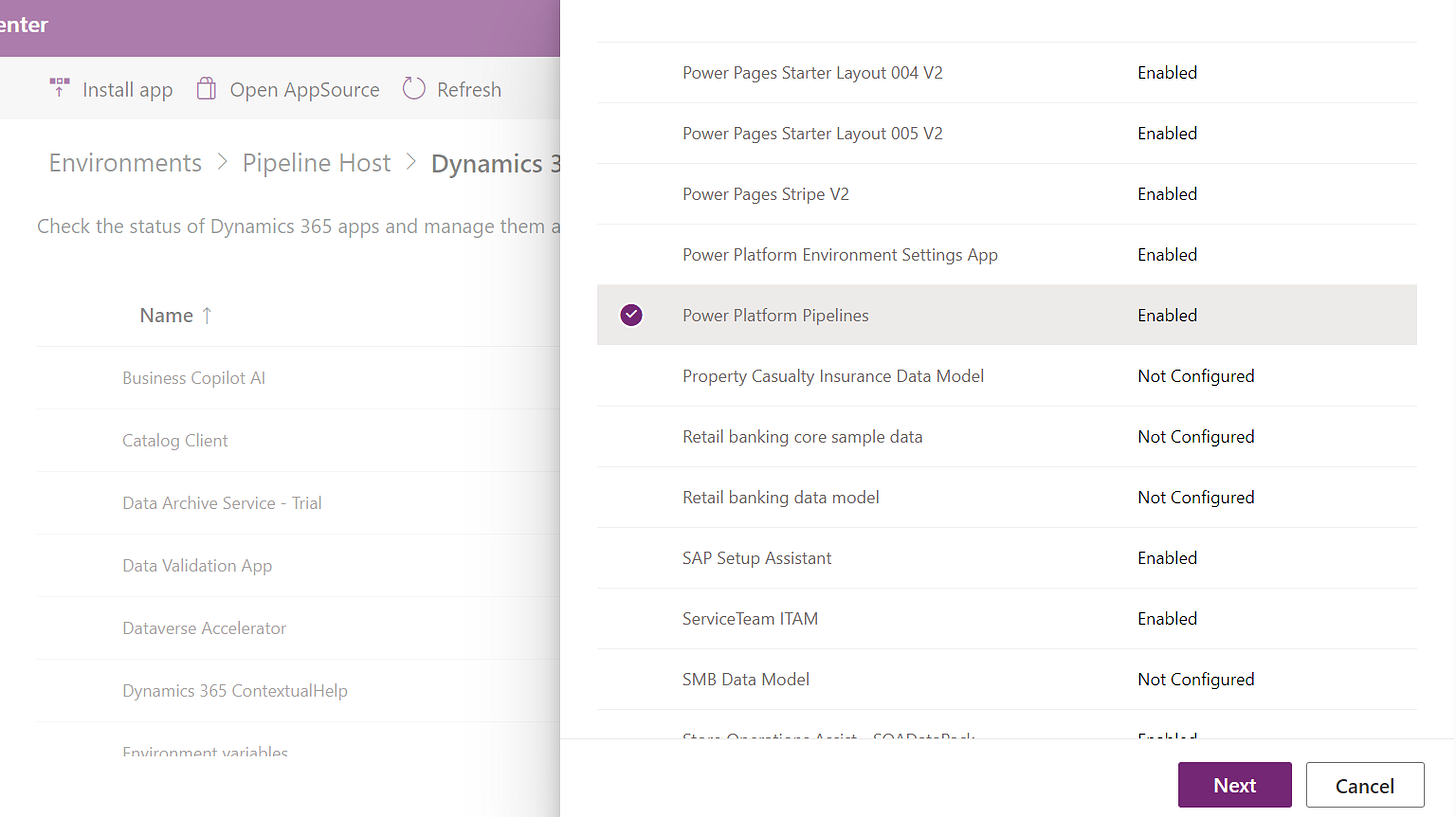
Accept the terms and click install and wait till the installation is complete.
Navigate to your environments and copy the environment ID for each of them in a notepad.
We will need them during the deployment configuration.
Deployment Configuration
Now, we head over to https://make.powerapps.com/
Switch to the Pipeline host environment.
Navigate to Apps and you will see that the following Deployment Pipeline Configuration app has been installed:

This is the model driven app that we will use to configure the deployment.
Play the app.
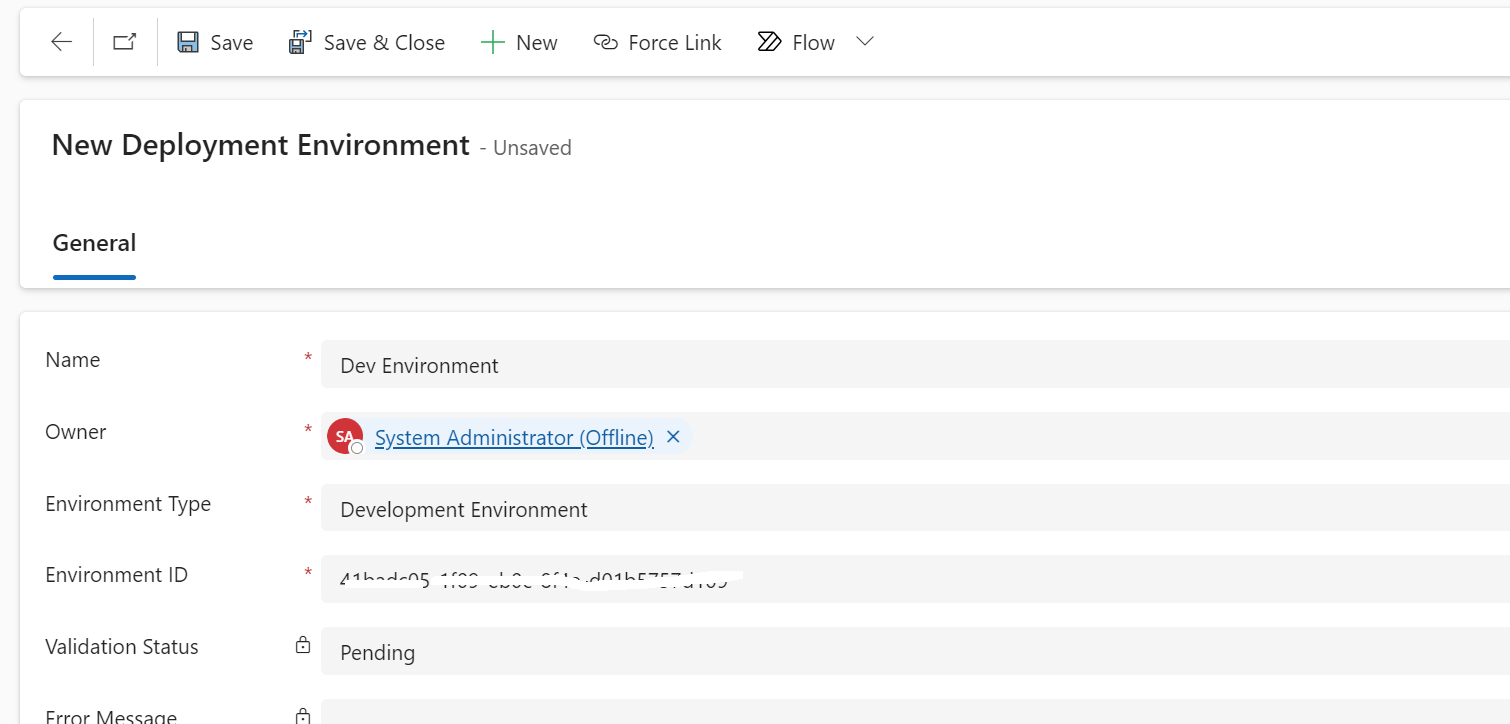
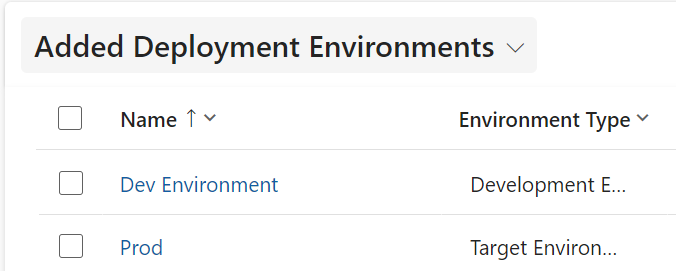
Create a new Deployment Environment.
From left hand side menu of the app, navigate to Environments -> New
Fill the form as shown below:

Repeat same for every other environment you have. and Select Type as Target ( The solution will be imported as a managed solution). Ideally, only the dev environment should be set as Development Environment.

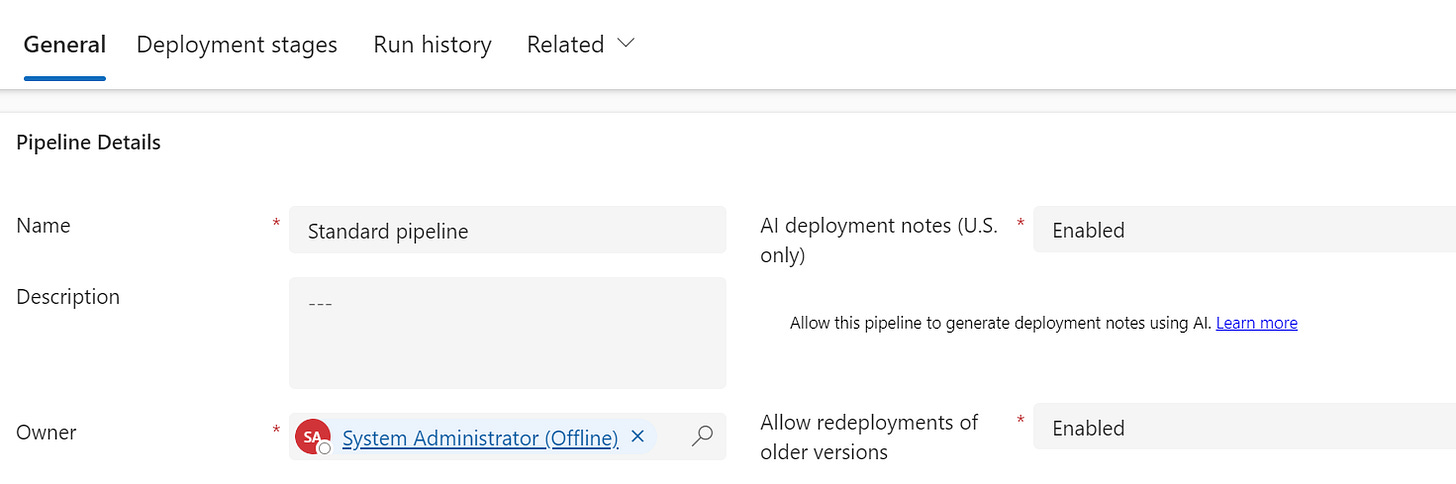
Next, navigate to Pipelines -> New and fill the forms as below:
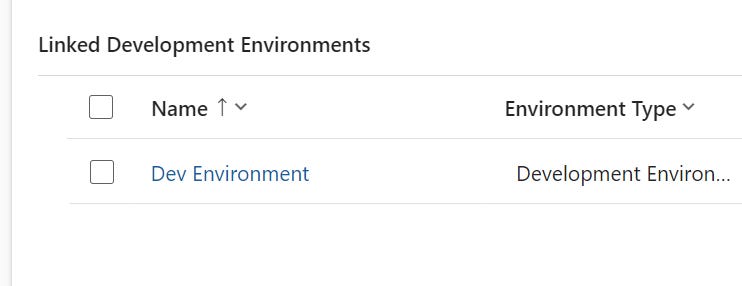
In the Linked Development Tab -> Add Existing and select the development environment you added in the previous step:
Let’s create the first deployment stage i.e from dev to prod. Navigate to the Deployment Stages tab and create New as shown below:
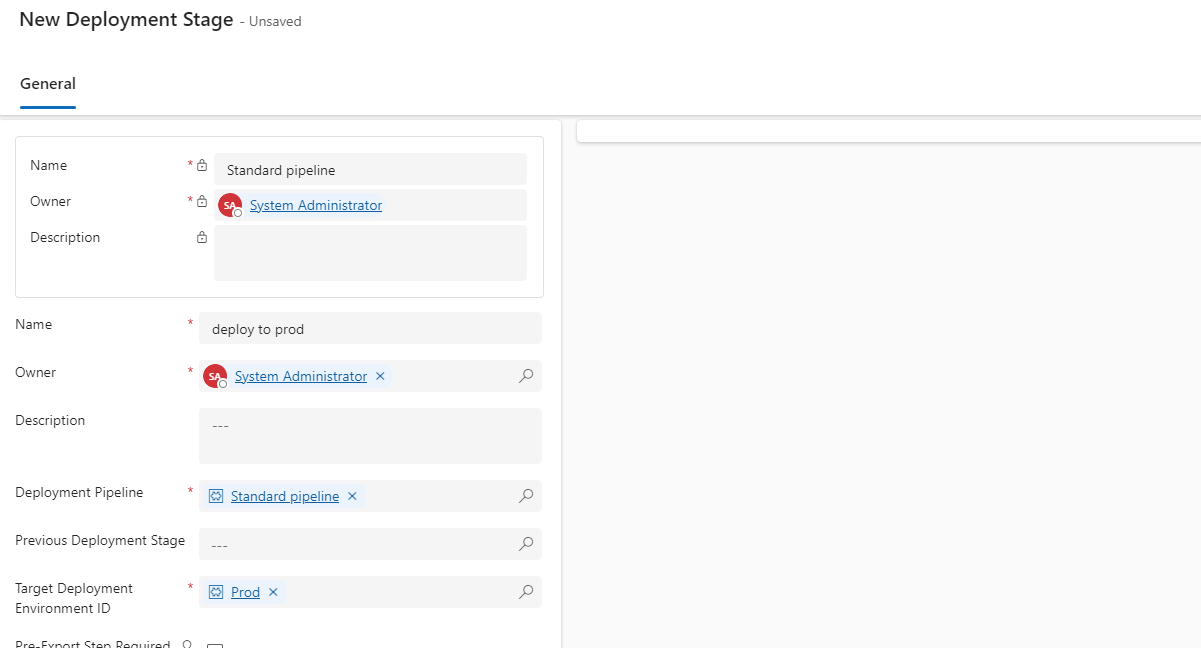
Notice that the field: Previous Deployment Stage is empty. This is because this is the first stage and there is no previous stage.
Repeat same for other environments example: UAT to Prod depending on the number of environments that you have. In other cases, you will set Previous Deployment Stage to the previous stage you created.
Now we are done configuring the pipeline. It is time to test the pipeline and see it action.
Run the Pipeline.
From the maker portal, switch to the dev environment.
Navigate to a solution that contains the customizations to be exported.
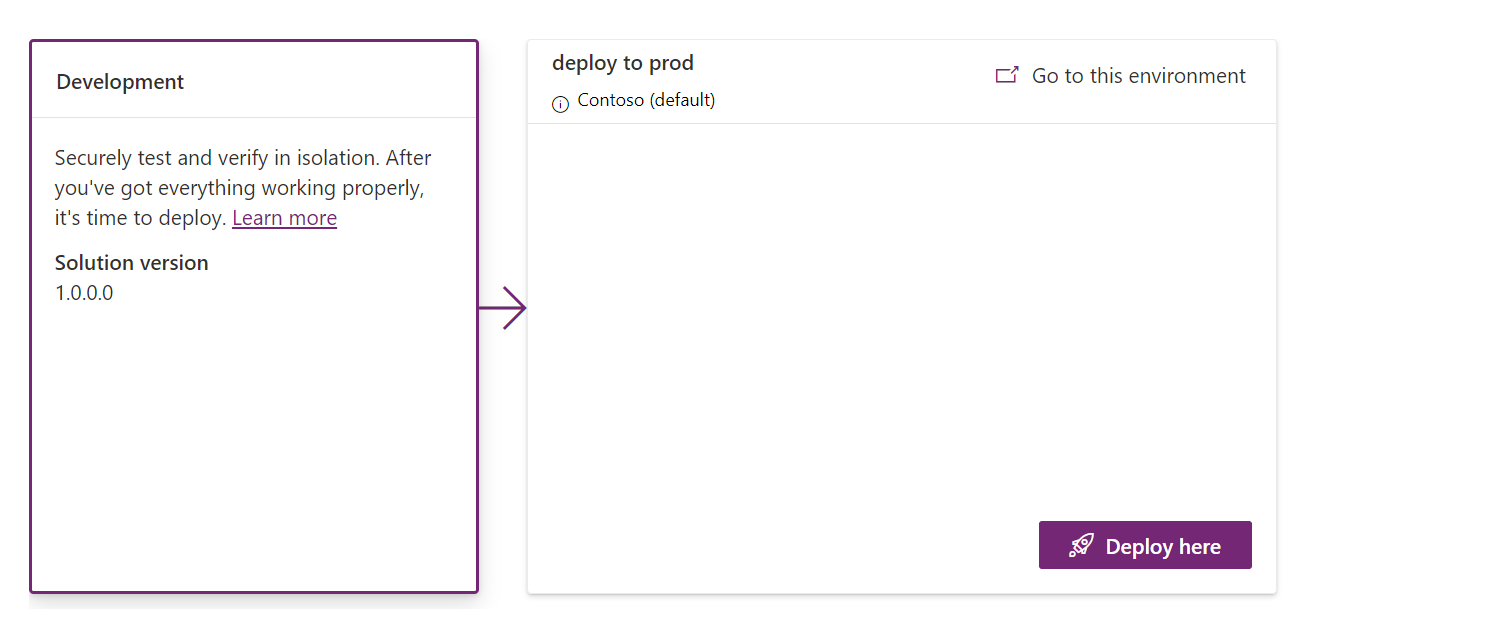
On the left hand side, Click on Pipeline Symbol as shown below:
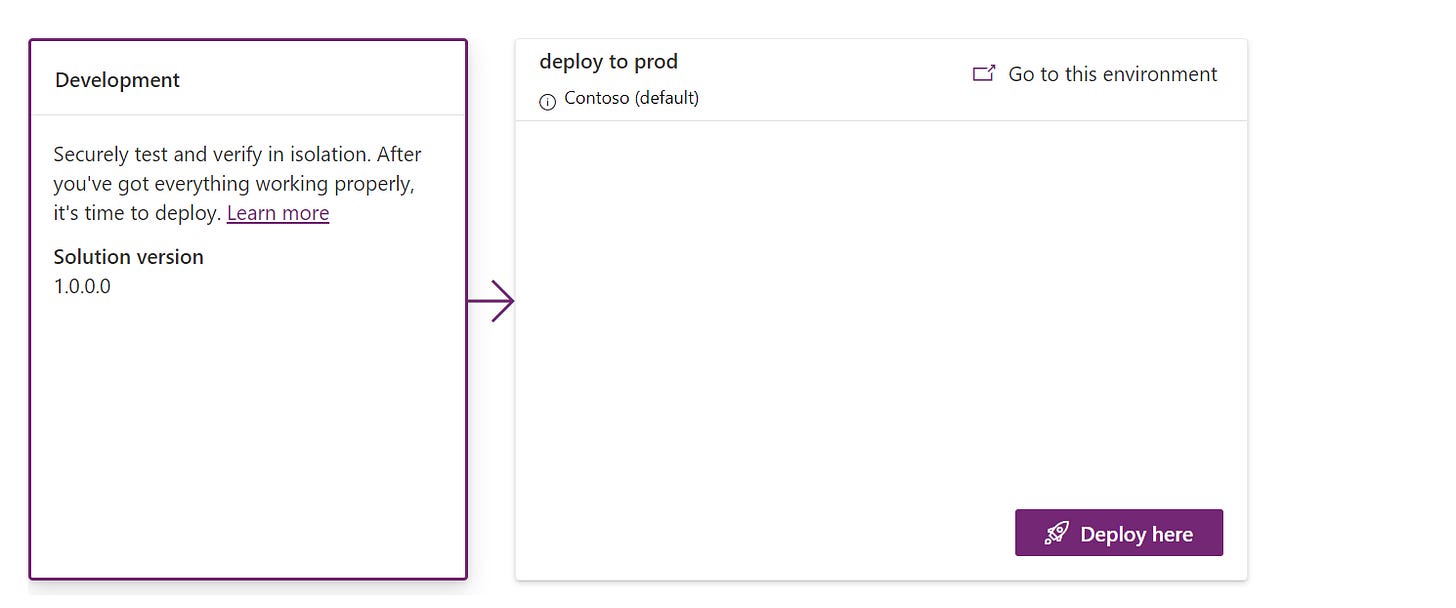
Click on Deploy here

On this page: You can provide environment variables.
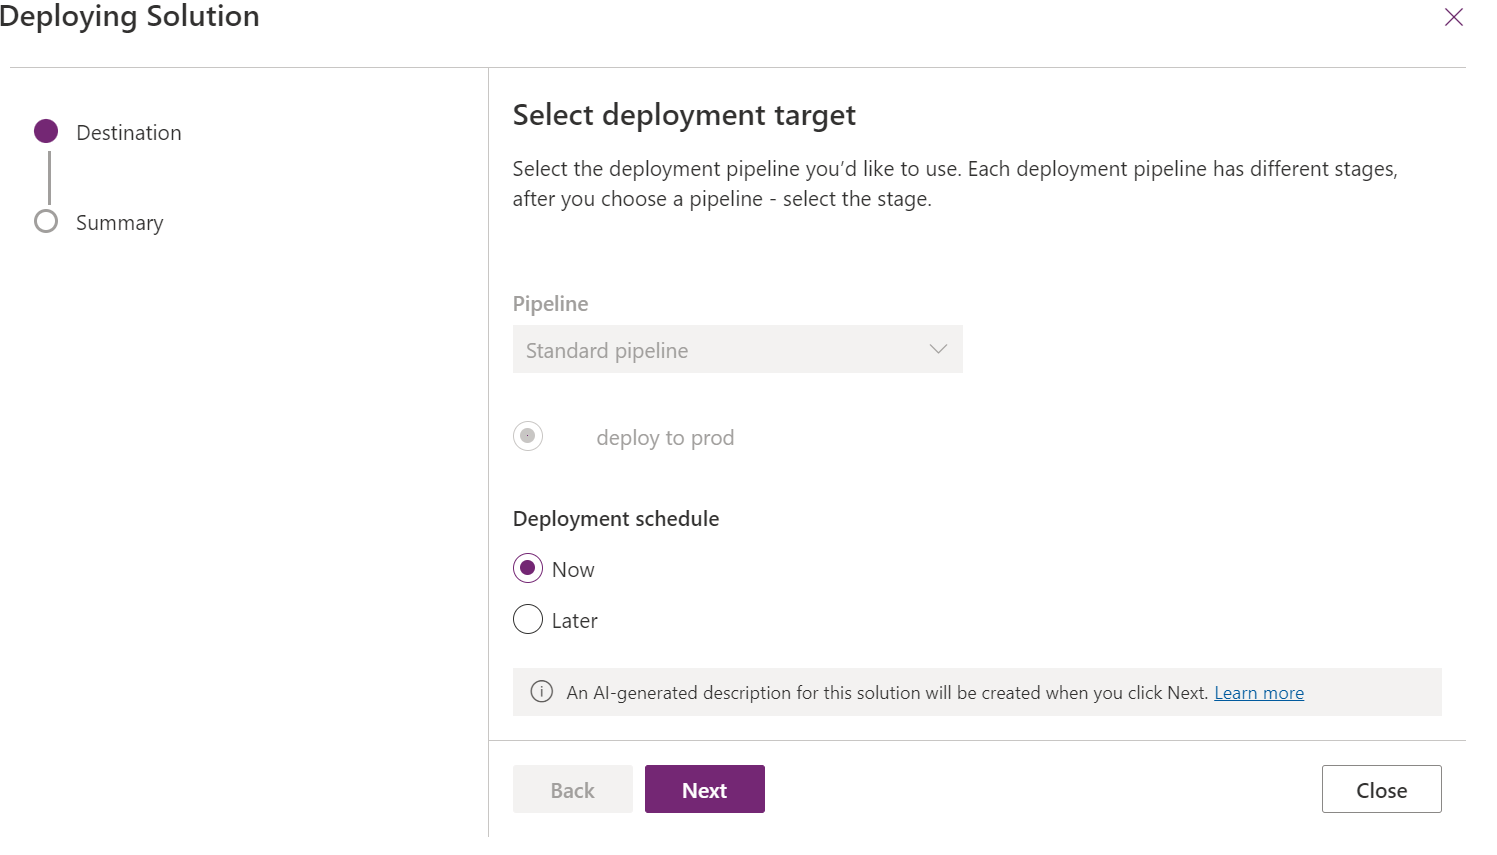
Select the Pipeline Stage. (In my case, I only have one)
Select the deployment schedule: Now or Later
Click Next and finally click Deploy.
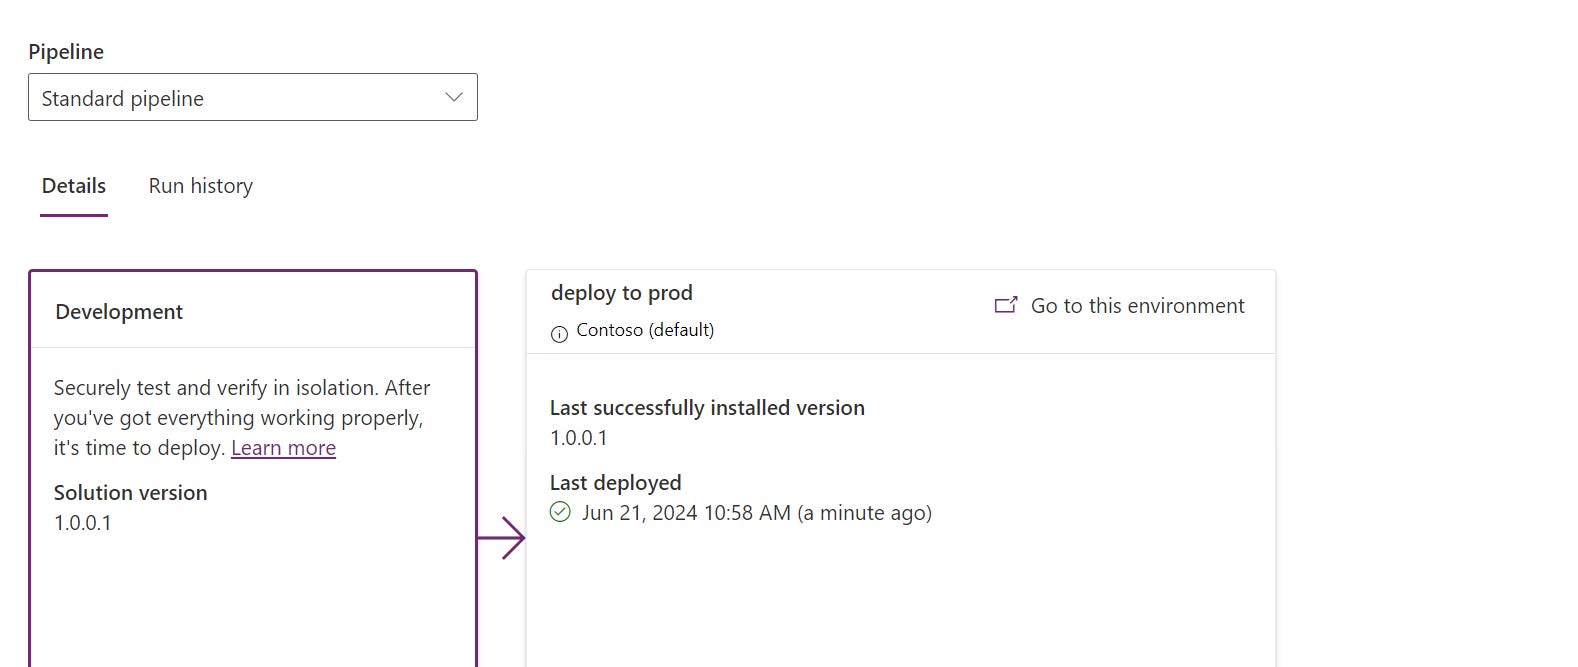
You will see the following screen, if everything goes well
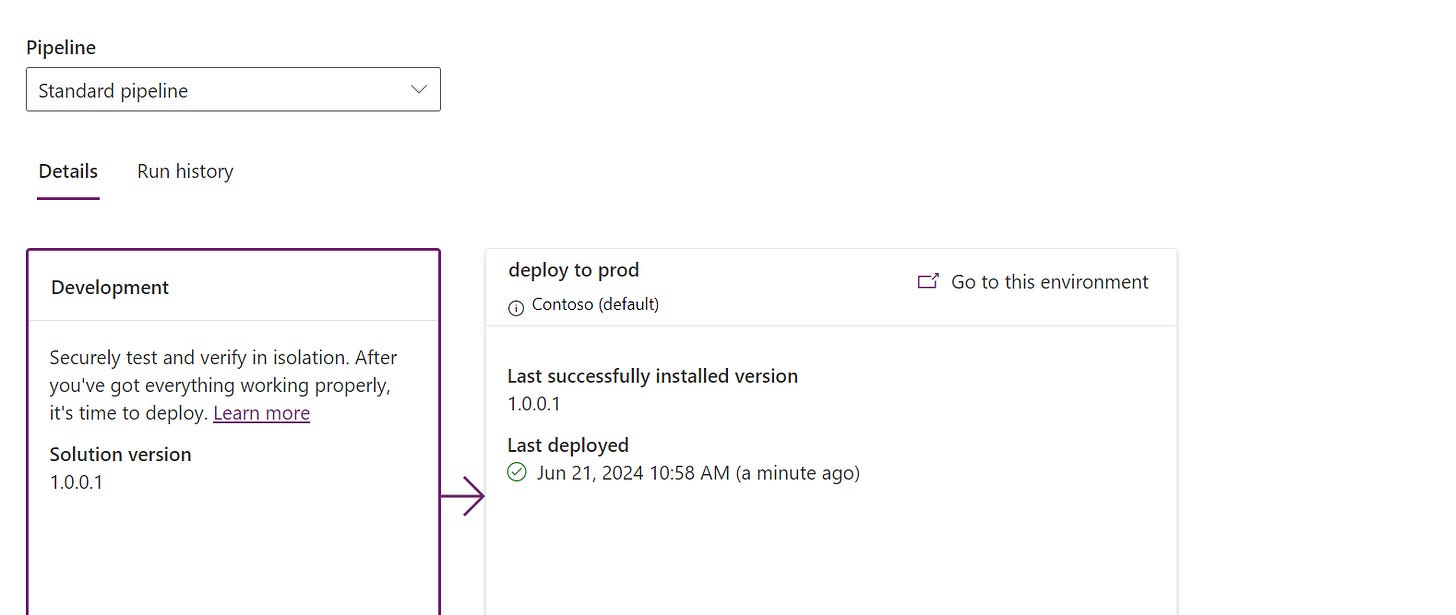
The solution will be exported as a managed solution in the destination environment.
Stay tuned for a complete tutorial on using Azure DevOps Pipeline for Power platform solutions deployment.